In this tutorial, I will provide a step by step details on how to create windows installer using Inno Setup. I found Inno Setup easy and free to use in creating an installer. I've used this to create installers for my Visual Basic projects and now I would like to share it to you. I will use a visual basic windows project as my example here to create an installer using Inno Setup.
So, here are the steps to follow.
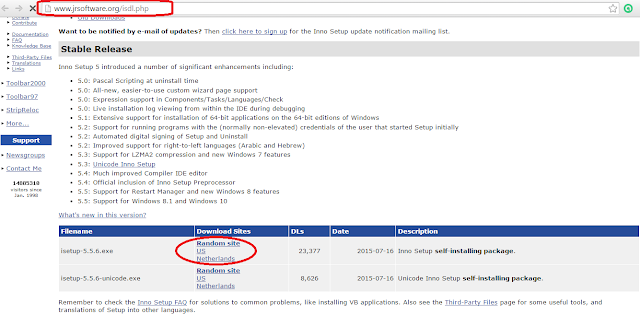
Step 1. Download and Install Inno Setup 5. It's free. Click here to download Inno Setup 5.
Step 2. Open a visual basic project you want to create an installer using Inno Setup.
Step 3. Publish the project. On your project Solution Explorer window, right click over project title and click Publish.
Step 4. Open the your project Publish folder and double click Setup to install your project application.
Step 5. After installing the application, Open the Task Manager and find for the location of the running application. To open Task Manager, click Start Menu and type taskmgr in Search programs and files.
Step 6. Copy and paste on your desktop the file location folder of the running application.
Step 7. Close the running application and open Inno Setup.
Step 8. On the welcome screen window of Inno Setup, select Create a new script file using the Script Wizard then click OK.
Step 9. Click Next.
Step 10. Fill in needed information and click Next. Company and website are optional.
Step 11. Click Next.
Step 12. Click Browse to add exe file of the application you want to create an installer. Find that exe file in the folder you pasted on your desktop.
Step 13. Add the remaining files in the same folder where the exe file is. Except for the exe file.
Step 14. Click Next.
Step 15. Check the following check boxes on Application Icons window. Click Next.
Step 16. You may leave Application Documentation window blank and click Next to proceed.
Step 17. Select any language you want your installer to be available. English is my preferred language. Click Next.
Step 18. On the Compiler Settings window, browse for the custom compiler output folder. This is the folder where to save the output installer of your application. You can also give a name for the output installer by typing in compiler output base file name text box. Then click Next .
Step 19. Click Next.
Step 20. Then click Finish.
Step 21. Would you like to compile the new script now? Choose Yes.
Step 22. Would you like to save the script before compiling? Choose No.
Step 23. Finally, your application installer will be compiled. You should see result like this.
Step 24. Close Inno Setup compiler window and look for the compiled installer of your application.
If you can't follow the instructions above, you may watch the video I uploaded on YouTube.


omg great share, thanks you :)
ReplyDeletewelcome :)
DeleteBSO88 Situs Terpercaya di seluruh Indonesia
ReplyDeleteDeposit Via Pulsa Tanpa Potongan
✅ Minimal depo 5k & wede 20k
✅ Bonus 10% member baru
✅ Bonus deposit harian 5%
✅ Bonus 10% Cashback slot
✅ Bonus rollingan 0,8%
✅ Bonus rollingan slot 0,1% ( setiap hari dibagikan )
Link Daftar